Showing posts with label Blogger. Show all posts

Saturday, November 24, 2018

Update the AdSense account associated with a Blogger site

Update the AdSense account associated with a Blogger site


If you're using a Layouts-enabled blog, you can associate an AdSense ad unit with a different AdSense account. To do so, simply follow these steps:
  1. Log into your Blogger account at http://www.blogger.com
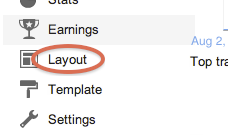
  2. Go to your blog's layout template page by clicking Layout on the left navigation bar.

  3. Blogger layout
  4. Click on the AdSense gadget
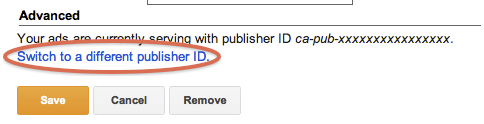
  5. Click on the Switch to a different publisher ID link at the bottom.

  6. Change pubid
  7. Enter your AdSense login (the email address you use to sign in to AdSense).
We'll then update your Google ads to be associated with your preferred AdSense account.
You may also find it helpful to check out the general instructions for implementing AdSense on Blogger.

Advertise on your blog

Advertise on your blog


With Blogger, you can make money with your blog by showing AdSense and other ads on your pages.
Note: Advertising on adult blogs is prohibited. Learn more about the Blogger Content Policy and Terms of Service.

Sign up for AdSense to show ads

  1. Sign in to Blogger.
  2. In the top left, click the Down arrow Down Arrow.
  3. Click the blog you want to run ads on.
  4. In the left menu, click Earnings.
  5. Click Sign up for AdSense. If you don’t see the button, it means your blog might not qualify for AdSense. Check the AdSense eligibility checklist to find out why.
  6. Fill out the form with your Google Account or create a new one.
Note: It can take at least 48 hours for your application to be reviewed.

Show ads between your posts

  1. Sign in to Blogger.
  2. In the top left, click the Down arrow Down Arrow.
  3. Click the blog you want to show ads on.
  4. In the left menu, click Layout.
  5. Depending on your template:
    • In "Blog Posts" under "Page Body," click Edit.
    • In "Blog Posts" under "Main," click Edit.
  6. In the window that appears, check the box next to "Show Ads Between Posts."
  7. Choose the ad format, colors, and how often the ads should appear.
  8. Click Save. 

Show ads in the columns

  1. Sign in to Blogger.
  2. In the left menu, click Layout.
  3. Click Add a Gadget.
  4. Select the AdSense gadget and click Add Add.
  5. Configure AdSense and click Save.
  6. In the top right, click Save arrangement.

Show ads from other ad services

  1. Sign in to Blogger.
  2. In the top left, click the Down arrow Down Arrow.
  3. Click the blog you want to show ads on.
  4. In the left menu, click Layout.
  5. In the area where you want to place the ads, click Add a gadget.
  6. In the window that appears, under "Basics," find HTML/Javascript and click Add Add.
  7. Enter a title (optional).
  8. Copy and paste the code from the ad service website into the content section.
  9. Click Save. 

See your Blogger earnings report

  1. Sign in to Blogger.
  2. Click the blog you want to see a report for.
  3. Click Earnings.
  4. Click Visit AdSense for details of my earnings.

What to do if AdSense isn’t turning on

  1. Sign in to Blogger.
  2. In the top left, click the Down arrow Down Arrow.
  3. On the Blogger dashboard, click the blog you want to put AdSense ads on.
  4. In the left menu, select Layout.
  5. Under the AdSense gadget, click Edit.
  6. Click Save.
  7. Repeat Steps 4 and 5 for every AdSense gadget on your blog.
  8. At the bottom of your "Blog Posts" gadget, click Edit.
  9. Click Save.
  10. In the top right, click Save arrangement.
  11. To check that your account is still active, go to AdSense.

Set up an ads.txt file

If your blog is monetized with third-party providers or you’ve manually integrated AdSense in your blog, you will need to manually set up the content of the ads.txt file.
  1. Sign in to Blogger.
  2. In the top left, click the Down arrow Down Arrow .
  3. Click the blog you want to set up an ads.txt file on.
  4. On the left, click Settings.
  5. Under "Settings," click Search preferences.
  6. Under "Monetization," find "Custom ads.txt" and click Edit.
  7. Click Yes.
  8. Copy the settings from your third-party monetization provider and paste them in the text box.
  9. Click Save settings.
  10. Optional: To check the content of your ads.txt file, go to http://<your blog address>/ads.txt.
Note: If your blog is not monetized, or it’s only configured to use AdSense using the Blogger-AdSense integration, then you do not need to manually set up ads.txt. Blogger will do this for you. Read more about ads.txt for AdSense.

Apply for a fully activated AdSense account to also show ads on my own site

AdMob, YouTube, Blogger, and host partnerships

Apply for a fully activated AdSense account to also show ads on my own site

When you signed up for AdMob, we also created a partially approved AdSense account for you. If you do have your own site that you’d like to show ads on, you can apply to fully activate your AdSense account, by adding “AdSense for content” as described below. Once your AdSense account is fully activated, you can earn money by displaying targeted Google ads on your site.
To show ads on your own site:
  1. Sign in to your AdSense account.
  2. Click Ads.
  3. Under “Add AdSense for content", click Apply now.
  4. Complete the AdSense application form, then click Submit my application.
  5. Finally, you need to create your first ad unit and place the ad code on the URL that you provided in your AdSense application, on a page that receives traffic. You can learn more about how to implement ad code on your site in our code implementation guide.
Note that until your AdSense account is fully activated, only blank ads will appear on your pages. Once your account is fully activated, you’ll receive a confirmation email and begin to see live ads. Please don't click on your live ads, even to test them -- doing so isn't permitted by the AdSense Program policies.
Once your application is approved, you’re welcome to place your ad code on any site that you own without any further approvals.